Binoculars for Stargazing: A Beginner's First Step Up
How do I use binoculars for stargazing?
On this page
Open by reassuring the reader that you don't need an expensive telescope to start exploring the cosmos. Frame binoculars as the most underrated, beginner-friendly tool that turns a few smudges of light into craters, star clusters, and moons—answering "how do I actually use binoculars for stargazing?" in plain language.
Why Binoculars Beat a Telescope for Beginners
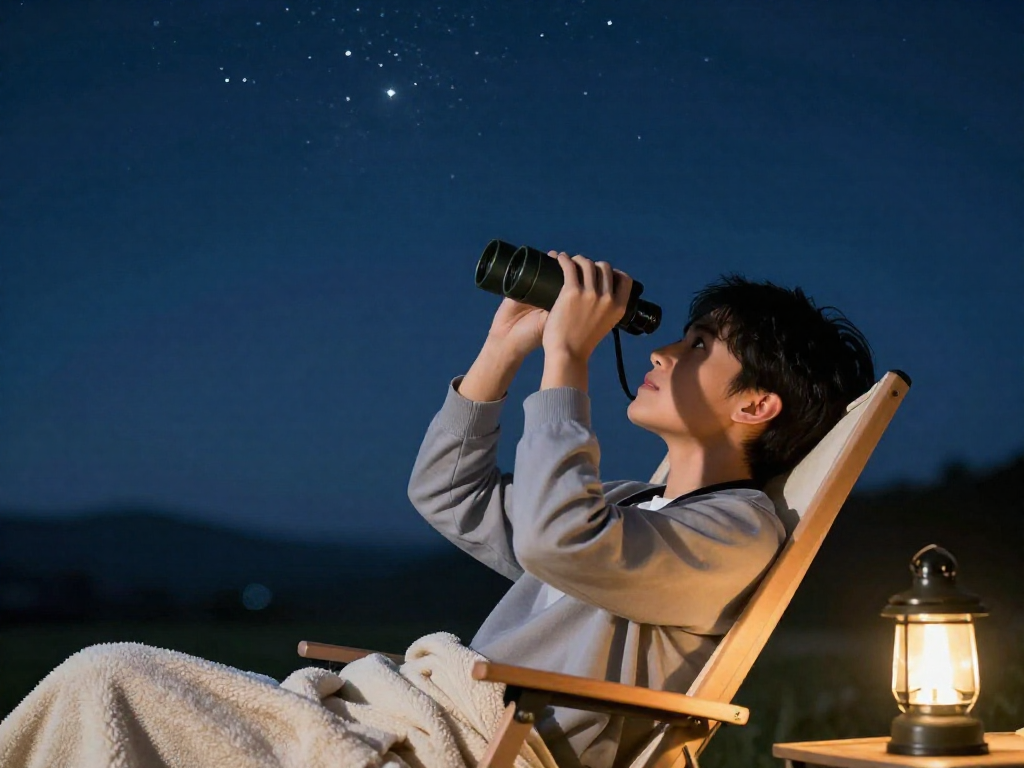
Picture this: a clear night, the Moon hanging low, and you wanting a closer look. Most people assume the answer is a telescope. But here's a secret seasoned stargazers love to share—a humble pair of binoculars is often the smarter first step.
Why? Start with the basics. Binoculars are cheaper, lighter, and ready the instant you pull them from a bag. No tripod to level, no parts to assemble, no fiddling in the dark. You just lift them and look up.
They're also far easier to aim. A telescope shows you a tiny slice of sky at high magnification, which makes finding anything feel like searching for a single word on a page through a drinking straw. Binoculars give you a wide field of view—the amount of sky you see at once—so spotting the Moon, a bright star cluster, or a passing planet is genuinely easy.
There's comfort, too. You use both eyes, which feels natural and relaxed, the way your vision normally works. And on a cloudy night, binoculars don't gather dust—they double for birding, hiking, or catching a distant landscape.
Best of all, they teach you the sky. Learn where things are with binoculars first, and you'll know exactly what you want when a telescope eventually tempts you.
Quick takeaway: Binoculars are cheap, simple, and easy to aim—the perfect, low-pressure way to begin exploring the night sky.
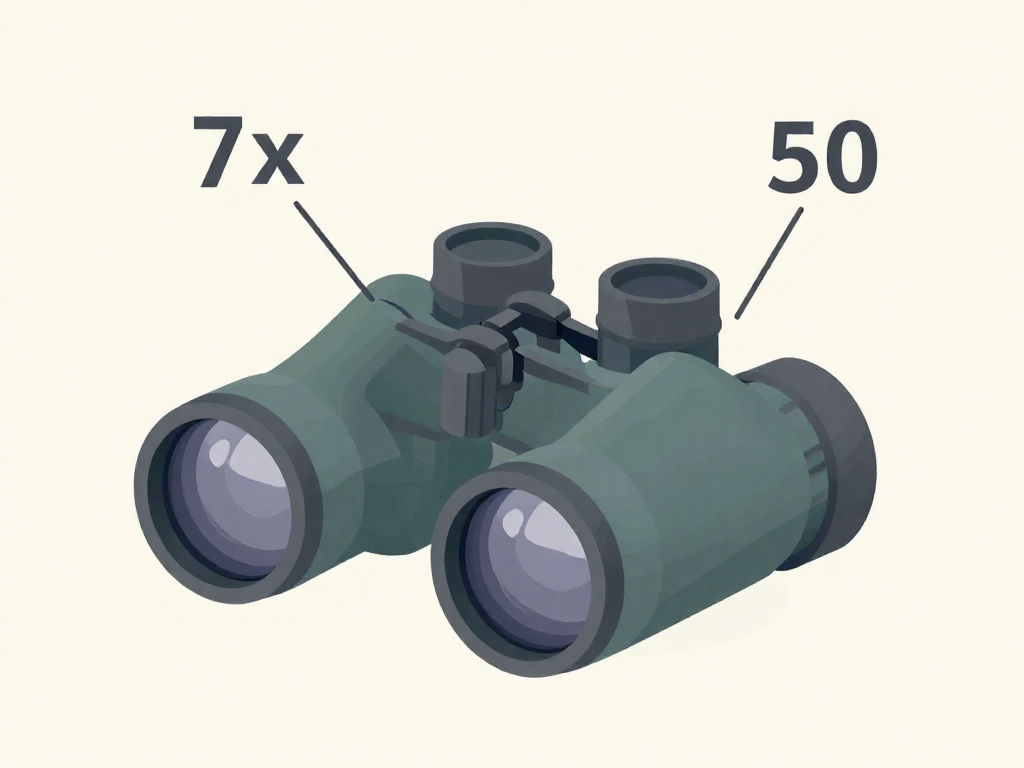
Understanding Those Two Numbers (Like 7x50)
Pick up any pair of binoculars and you'll spot a code stamped on them, something like 7x50 or 10x42. It looks technical, but it's really just two simple facts about what you're holding. Crack the code, and you can shop with confidence.
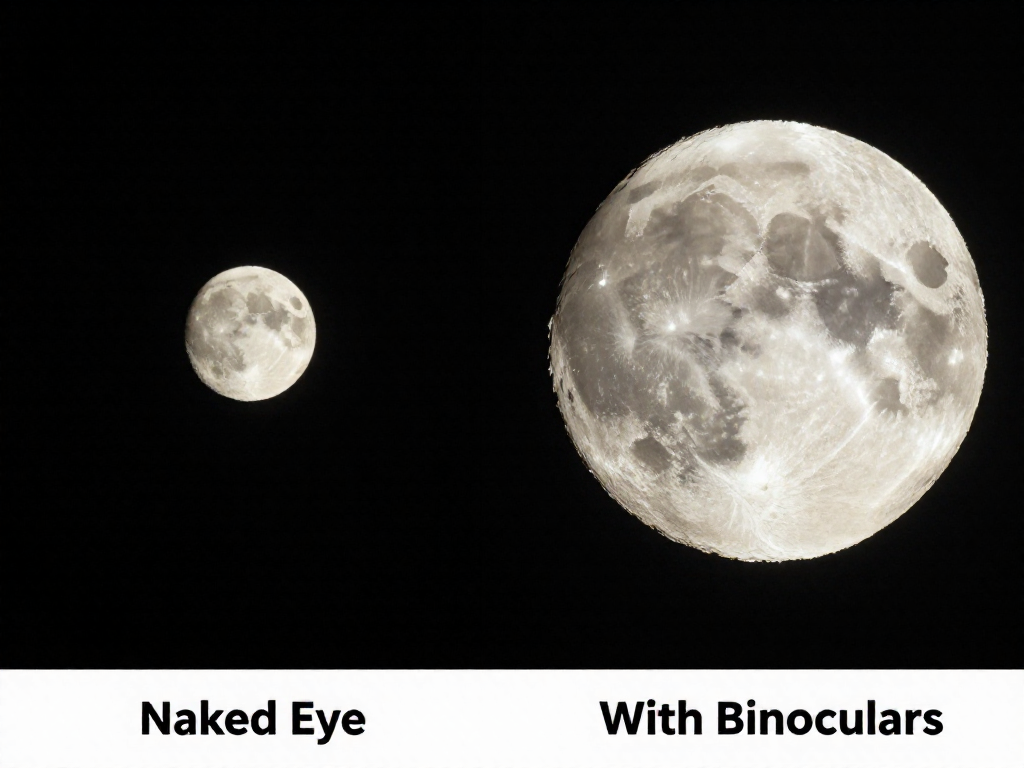
The first number is magnification. A "7x" means objects look seven times closer than they do with your naked eye. The Moon, for example, jumps from a distant coin to something you can study. Bigger isn't always better, though—we'll see why in a moment.
The second number is the objective lens diameter, measured in millimeters. These are the big lenses at the front, the ones pointing at the sky. A "50" means each is 50mm across. Think of them as buckets that catch starlight: the wider the bucket, the more light pours in, and the brighter and clearer faint objects appear.
For the night sky, light beats zoom. Stars and galaxies are dim, so gathering light matters more than magnifying it. A modest 7x with a generous 50mm lens will show you more than a high-power 12x with tiny lenses, which only delivers a dim, shaky image.
Exit pupil—the easy version. Divide the second number by the first (50 ÷ 7 ≈ 7). That's the width, in millimeters, of the bright circle of light reaching your eye. A young eye's pupil opens to about 7mm in the dark, so a 7mm exit pupil makes full use of the light coming through—ideal for stargazing.
Field of view is simply how wide a patch of sky you see at once. A wider view makes it far easier to sweep around and actually find things, which is a beginner's best friend.
Quick takeaway: For the night sky, choose generous light (a big second number) and a comfortable exit pupil over raw zoom. A classic 7x50 is a beginner favorite for good reason.
The Best Binoculars for Stargazing (and What to Avoid)
Here's the short version so you can stop overthinking it: get a pair of 7x50 or 10x50 binoculars. Those numbers mean 7 (or 10) times magnification with 50mm front lenses—wide enough to gather plenty of light for dim stars, and steady enough to hold by hand. They're the classic beginner sweet spot for good reason.
What to avoid:
- Super-high magnification (15x and up). It sounds better, but more zoom also magnifies the tiny shakes in your hands, turning the night sky into a jittery blur. Anything above 10x usually needs a tripod to enjoy.
- Cheap zoom binoculars. The adjustable-zoom feature sounds handy but almost always means dimmer, fuzzier views. A fixed magnification does one job well.
- Gimmicky "astronomy" marketing. A regular quality 10x50 pair is already an astronomy binocular. Don't pay extra for the label.
Roof vs. porro prism—in plain terms: Prisms are the glass inside that flips the image right-side up. Porro prisms have that classic zigzag, bulky shape and usually give brighter views for less money. Roof prisms are the sleek, straight-tube style—lighter, but you pay more for the same brightness. For stargazing on a budget, porro wins.
Budget reality check: You don't need to overspend. Solid, sky-worthy 7x50 or 10x50 porro binoculars exist at modest prices—plenty to reveal the Moon's craters, Jupiter's moons, and star clusters.
Quick takeaway: Buy 10x50 (or 7x50) porro-prism binoculars. Skip the zoom, skip 15x+, and don't fall for "astronomy" branding.
How to Actually Use Them Under the Stars
You've picked your binoculars—now comes the fun part. A few simple habits make the difference between a frustrating blur and a sky full of detail.
1. Set them up for your eyes (you only do this once). Look for the diopter, a small adjustment ring usually on the right eyepiece. It fine-tunes the focus to account for the difference between your two eyes. Cover the right lens, focus on a distant object with the main focus wheel, then cover the left lens and adjust only the diopter until that side is sharp too. Finally, bend the two barrels closer together or further apart until the two circles you see merge into one clean circle. Done.
2. Give your eyes time to adjust. Your eyes need about 20 to 30 minutes in darkness to reach full night vision, and a single glance at a phone screen can reset much of it (NASA). Be patient—faint stars and the soft glow of the Milky Way only appear once your eyes are fully dark-adapted.
3. Hold them steady. At magnification, even a tiny hand tremble looks like an earthquake. Steady yourself by leaning against a wall or car, resting your elbows on a fence, or—best of all—lying back in a reclining lawn chair so the sky fills your view. For longer sessions, a tripod adapter (a cheap bracket that screws your binoculars onto a camera tripod) is a game-changer.
4. Aim with your eyes first. Spot your target—the Moon, a bright star, a fuzzy patch—with your naked eyes, keep your gaze locked on it, then raise the binoculars straight up to your eyes without looking away.
5. Keep a red flashlight handy. Red light lets you read a star map without wrecking the night vision you waited so long to build.
Quick takeaway: Set the diopter once, dark-adapt for 20+ minutes, brace yourself, aim with your eyes, and use red light. That's the whole routine.
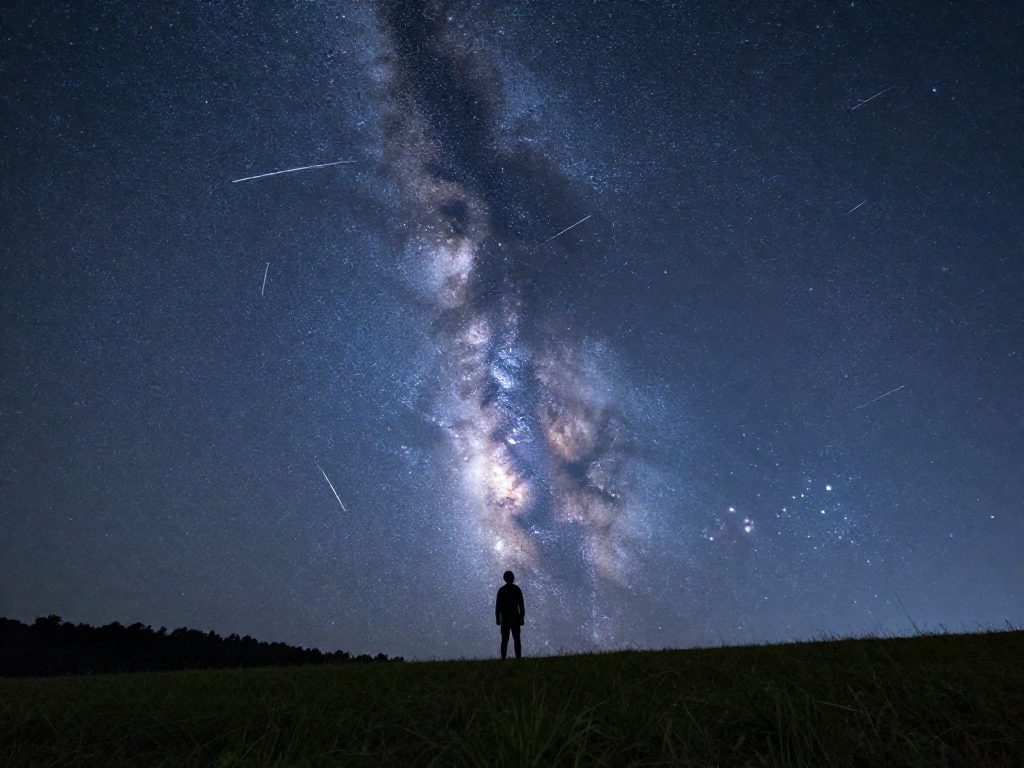
First Things to Spot Tonight
You don't need a special night or perfect conditions to start. Grab your binoculars, step outside, and try these five targets—each one delivers a genuine "wow" without any effort.
-
The Moon's craters. Aim along the terminator—the line where the Moon's lit side meets its dark side. Shadows there are long and dramatic, making craters and mountains pop into 3D. A full Moon actually hides this detail, so a half or crescent Moon is your best bet.
-
Jupiter's four moons. Point at the brightest "star" in that part of the sky and you'll spot up to four tiny dots lined up beside it. These are the Galilean moons, first seen by Galileo in 1610 (NASA). Check again the next night and they'll have shifted as they orbit.
-
The Pleiades (M45). To the naked eye it looks like a fuzzy smudge; through binoculars it bursts into dozens of sparkling blue stars—a stunning cluster of stellar siblings.
-
The Andromeda Galaxy. This faint glowing oval is the farthest thing your eyes can reach: an entire galaxy of a trillion stars, about 2.5 million light-years away (NASA). The light hitting your eye left before humans existed.
-
The Orion Nebula. Below Orion's "belt," look for a misty patch—a stellar nursery where new stars are forming. Then simply sweep along the Milky Way and drink in the star fields.
Quick takeaway: Five easy targets, one night, zero experience needed.
Common Beginner Mistakes (and Easy Fixes)
Almost everyone stumbles the same way at first. Here's how to skip the frustration:
-
Expecting Hubble. Binoculars won't show swirling galaxies in full color—that's space-telescope territory. What they will show is the Moon's craters, Jupiter's moons as tiny dots, and star clusters sparkling like spilled sugar. Adjust your expectations and the wonder takes care of itself.
-
Shaky hands. More magnification just magnifies your wobble. Instead of zooming, steady yourself: lean against a wall, rest your elbows on a car roof, or lie back in a reclining chair.
-
Stargazing from a bright backyard. Streetlights and porch lights wash out faint objects. Even moving to a darker corner—or a nearby park—reveals dramatically more.
-
Killing your night vision. Your eyes need about 20 minutes in darkness to fully adjust ("dark adaptation"). One glance at a bright phone resets it. Dim your screen or use a red-light mode.
-
Skipping focus and diopter. The diopter is a small adjustment dial that fine-tunes each eye separately. Set it once for your vision and views snap sharp.
Quick takeaway: Stabilize, find darker skies, protect your night vision, and focus properly—small fixes, huge difference.
FAQ
What size binoculars are best for stargazing?
For beginners, 10x50 binoculars are the sweet spot. The two numbers tell you almost everything: the first (10x) is the magnification, meaning objects look 10 times closer than with your naked eye, and the second (50) is the width of the front lenses in millimeters, which controls how much light they gather. Bigger front lenses mean brighter views of faint stars—think of them as wider buckets catching more starlight. A 10x50 pair is powerful enough to reveal craters on the Moon and star clusters, yet light enough to hold steady by hand. If you want a slightly easier-to-hold option, 7x50 or 8x42 work beautifully too. Avoid jumping straight to very high magnifications like 15x or 20x at first, because the higher the power, the more every tiny hand-shake is magnified, leaving the view wobbly.
Can you really see planets with binoculars?
Yes, though don't expect the colorful, detailed photos you've seen from spacecraft. With ordinary 10x50 binoculars you can spot the four largest moons of Jupiter—the same ones Galileo discovered in 1610—as tiny points of light lined up beside the planet, shifting position from night to night. Venus appears as a brilliant 'star' and, at certain times, you may notice it isn't a full circle but a phase, like a tiny moon. Saturn looks like a small oval rather than a clear sphere, hinting at its rings, though you generally need a telescope to see the rings clearly. Mars and Mercury mostly stay as bright dots. The real magic is realizing those points of light are entire worlds, and that you're seeing them with your own eyes much as the first astronomers did.
Do I need a tripod for stargazing binoculars?
Not to get started—a standard 7x50 or 10x50 pair is designed to be used handheld, and for casual scanning of the Moon, bright planets, and star fields that's perfectly fine. You'll notice, however, that even a steady hand produces a slight wobble, and that wobble grows the longer you look or the higher the magnification. A tripod (or a simpler 'monopod,' a single adjustable pole) removes the shake and lets you study fainter, more detailed objects in comfort, especially while looking straight up. If you choose larger or higher-power binoculars—roughly 15x and above, or anything heavy—a tripod stops being optional and becomes essential. Look for binoculars with a tripod adapter thread, usually a small cap on the central hinge, so you can attach them when you're ready.
Are binoculars or a telescope better for beginners?
For most newcomers, binoculars are the smarter first step—and here's the surprising part: they're not just a cheaper compromise. Binoculars are quick to grab, easy to point (you simply look where you're already looking), and they show a wide patch of sky, which makes finding things far less frustrating than peering through a narrow telescope view. They also use both eyes, giving a more natural, immersive feel. A telescope offers much more magnification and can reveal Saturn's rings, distant galaxies, and fine lunar detail, but it requires setup, aiming practice, and patience that can discourage true beginners. A good path is to learn the sky with binoculars first; if your curiosity keeps growing, a telescope becomes a rewarding next purchase rather than an intimidating one gathering dust in a closet.
How do I keep binoculars steady when looking up?
Steadiness is mostly about supporting your arms rather than gripping harder. A few simple tricks make a big difference: lean against a wall, fence, or car; sit in a reclining lawn chair so you can tilt back without straining your neck; or rest your elbows on a railing or your own raised knees. Pulling the binoculars firmly against the bony ridges around your eyes also anchors them to your head, turning your skull into a built-in stabilizer. Slowing your breathing and relaxing your shoulders reduces the jitter too. If you still find the view bouncing—common at higher magnifications—a monopod or tripod will lock everything in place. And remember a comfortable observer is a steady observer, so dress warm and get cozy before you start scanning the sky.
See also
- Best Beginner Telescopes Under $200
- How to Find Constellations Without an App
- What You Can See in the Night Sky Tonight
- A Beginner's Guide to Dark Sky Locations
- Understanding the Phases of the Moon
Related articles
How to Photograph the Night Sky With Just a Phone
Yes, you can take stunning night sky photos with just a phone. Learn beginner-friendly settings, gear, and tricks to capture stars, the Moon, and the Milky Way.
Jun 29, 2026 · 11 min read

What Causes the Northern Lights, and Can Beginners See Them?
Curious about the Northern Lights? Learn what causes auroras in plain language, where and when to see them, and realistic tips for total beginners.
Jun 29, 2026 · 8 min read
A Beginner's Sky-Watching Calendar: Events Worth Looking Up For
A simple year-round sky-watching calendar for beginners. Discover meteor showers, eclipses, and planet sightings worth looking up for—no telescope needed.
Jun 29, 2026 · 5 min read