How to Photograph the Night Sky With Just a Phone
Can I take night sky photos with my phone?
On this page
Yes, You Really Can Photograph the Night Sky With a Phone
Short answer: yes. If your phone is from the last four or five years, it can already capture the night sky in ways that would have stunned photographers a generation ago. The Moon, bright planets like Jupiter and Venus, sparkling star fields, and even the glowing band of the Milky Way are all within reach.
So what's realistic? Quite a lot. With a steady setup and a little patience, you can also catch constellations and the streaks of a meteor shower.
What's genuinely hard? Faint, far-away targets such as distant galaxies and nebulae (giant clouds of gas and dust where stars are born). These usually need a dedicated camera or a telescope to come through clearly.
Here's the reassuring part: great night-sky photos come from technique and light, not the price tag on your phone. Knowing where to point it and how to hold it still matters far more than having the newest model.
Quick takeaway: Your phone can shoot the Moon, planets, and the Milky Way—skill beats specs.
What You Need Before You Start
Good news: you almost certainly already own most of what you need. Here's the short list to get ready without spending a cent.
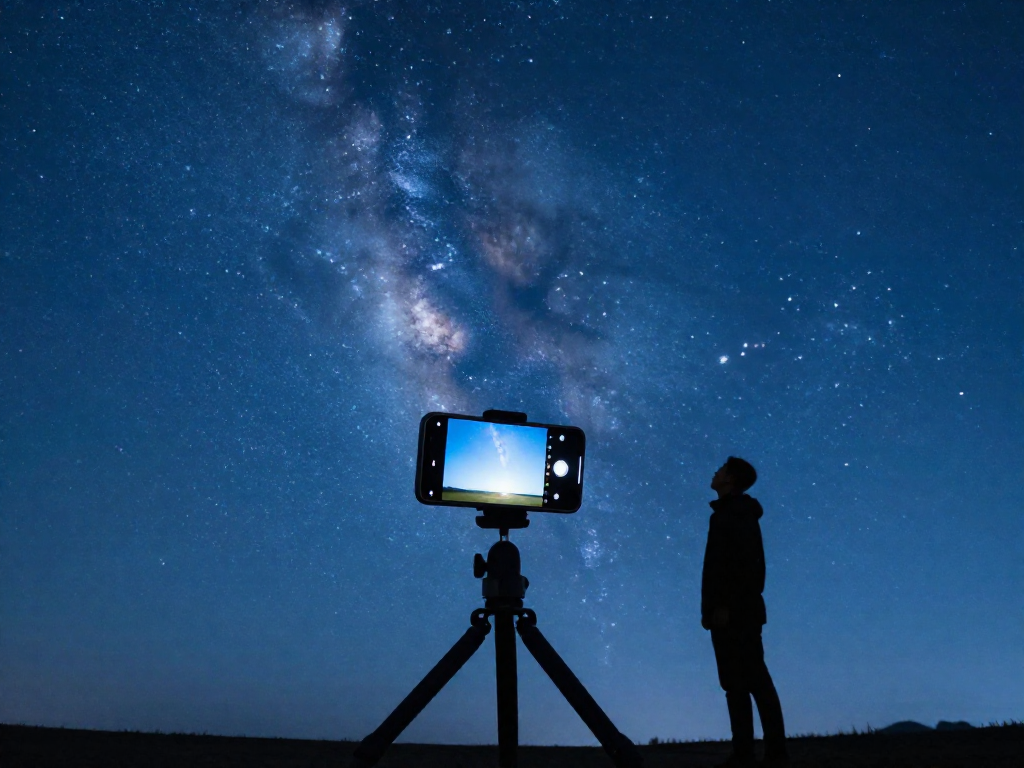
- Something to hold your phone perfectly still. Even the steadiest hands wobble during the long exposures that night photos need (the camera keeps its "eye" open longer to soak up faint light). A small tripod is ideal, but a rock, a wall, a fence post, or a beanbag works just as well. The goal is zero shake.
- A dark spot away from city lights. The glow from streetlights and buildings—called light pollution—washes out the stars like a flashlight drowns out a candle. Even a 20-minute drive out of town helps. Use a free light-pollution map (such as the one at darksitefinder.com) to find a darker patch nearby.
- The right night for your subject. For stars, you want a clear, moonless night, since a bright Moon outshines fainter stars. But if the Moon itself is your target, a bright Moon night is perfect.
- Time to adjust to the dark. Your eyes need about 20 minutes to fully adapt to darkness, and so does your phone's camera. Bring a red flashlight (or tape red plastic over a normal one)—red light lets you see without ruining your night vision.
- Optional cheap upgrades. A bluetooth remote or your phone's timer prevents the tiny shake from tapping the screen. A clip-on lens (often under $20) can widen or zoom your view.
Quick takeaway: A steady surface, a dark sky, and the right night are 90% of the battle—and all free.
The Phone Camera Settings That Actually Matter
Here's the secret most people miss: your phone is already capable of capturing stars. You just have to stop it from behaving like it's daytime. A few settings make the difference between a black rectangle and a sky full of pinpricks of light.
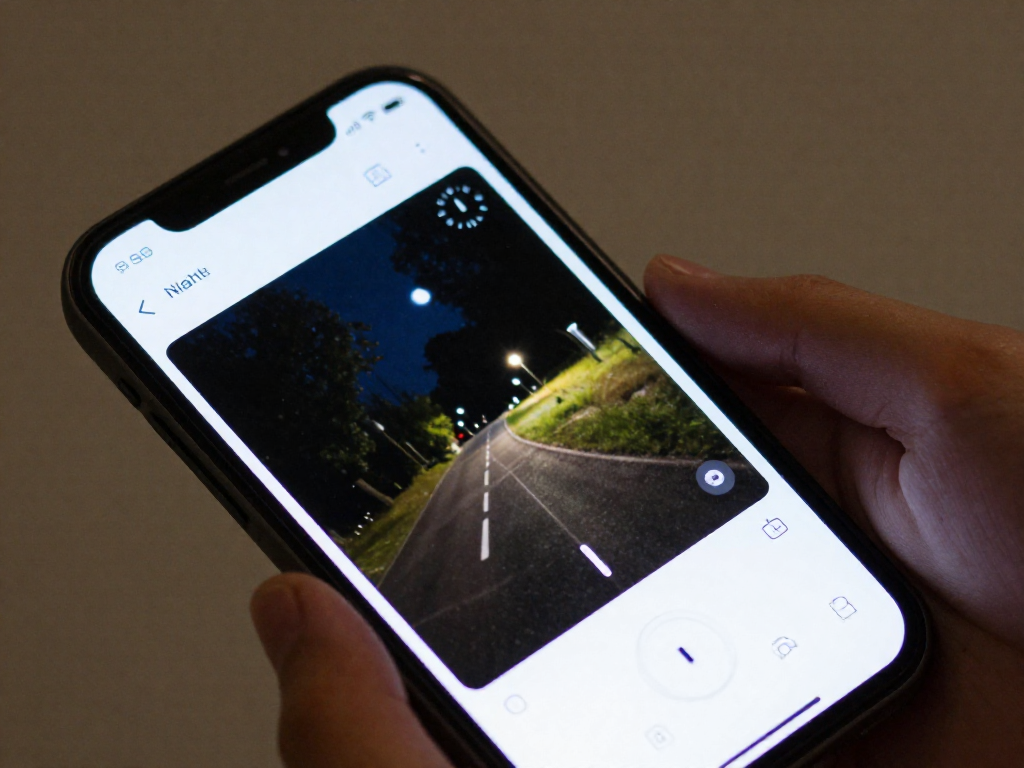
Ditch the flash, find the right mode. Turn the flash off first — it lights up everything within a few feet and nothing in the sky. Then look for Night mode (an automatic setting that brightens dark scenes) or Pro/Manual mode, where you control the camera by hand. Manual gives you the best results, so it's worth hunting for in your camera app.
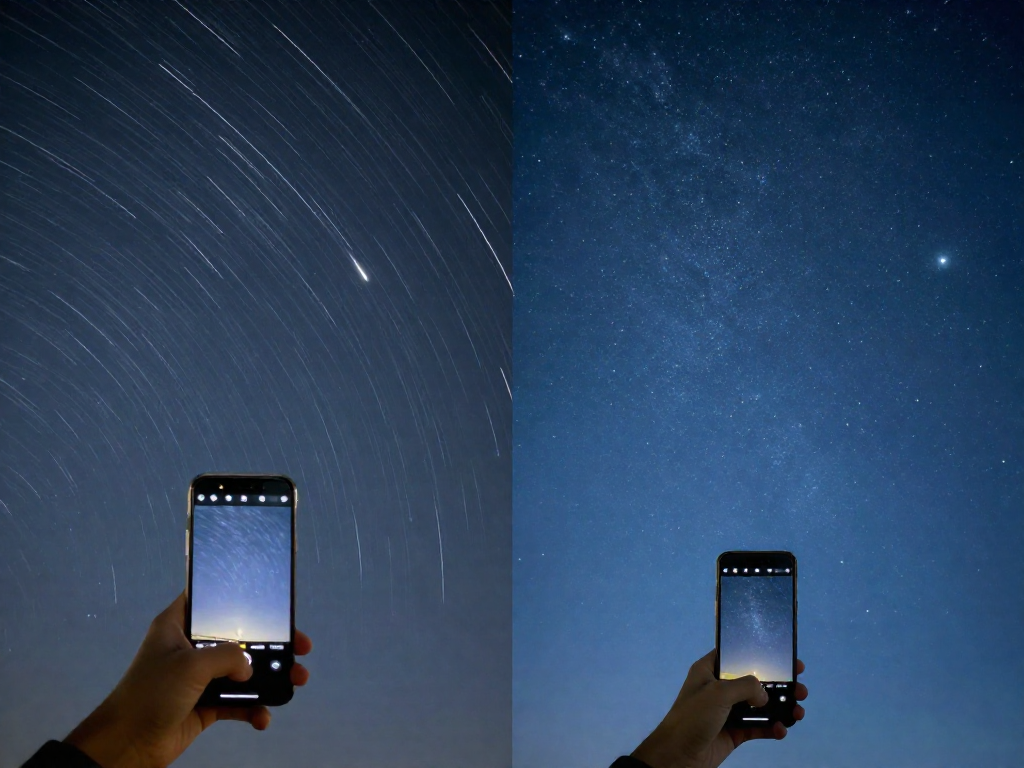
Let the shutter stay open longer. A long exposure means the camera collects light over several seconds instead of an instant, the way leaving a bucket out longer catches more rain. Aim for 10 to 30 seconds. Go much longer and the stars start to smear into short trails, because the Earth is slowly turning beneath them.
Set ISO without overcooking it. ISO controls how sensitive the camera is to light. Crank it too high and your photo fills with "noise" — that grainy, speckled look. Start around 800–1600, take a shot, and adjust: brighter but grainier, or darker but cleaner.
Focus to infinity. Phones love to focus on nothing in the dark. Switch to manual focus and slide it to infinity (often marked with an ∞ symbol), or tap a bright star on screen to lock it. Sharp stars are the whole goal.
Don't touch the phone when it shoots. Even tapping the screen shakes the camera enough to blur a long exposure. Use the built-in timer (a 3-second delay) or a remote/voice shutter so the phone sits perfectly still.
Shoot in RAW if you can. RAW saves all the original light data instead of a compressed snapshot, giving you far more room to brighten and fine-tune later.
Quick takeaway: Flash off, Night or Manual mode, 10–30 second exposure, ISO 800–1600, focus to infinity, and a timer to keep things steady.
Step-by-Step: Your First Night Sky Photo
Ready to point your phone at the stars tonight? Follow these five steps and you'll have your first cosmic snapshot in minutes.
1. Steady your phone. The biggest enemy of night photos is movement. Because the camera keeps its "eye" open for several seconds to soak up faint starlight, even a tiny wobble turns stars into blurry streaks. Prop your phone on a small tripod, a wall, a rock, or anything rock-solid. No tripod? A beanbag or rolled-up jacket works surprisingly well.
2. Open Night or Pro mode and set your controls. Night mode (most newer phones have it) does the heavy lifting automatically. For more control, switch to Pro or Manual mode and adjust three things:
- Exposure — how long the camera "stares" at the sky. Start around 10–15 seconds.
- ISO — your camera's sensitivity to light, like turning up the brightness dial. Start near 800–1600.
- Focus — set it to infinity (often a mountain icon ∞) so distant stars come out sharp instead of soft.
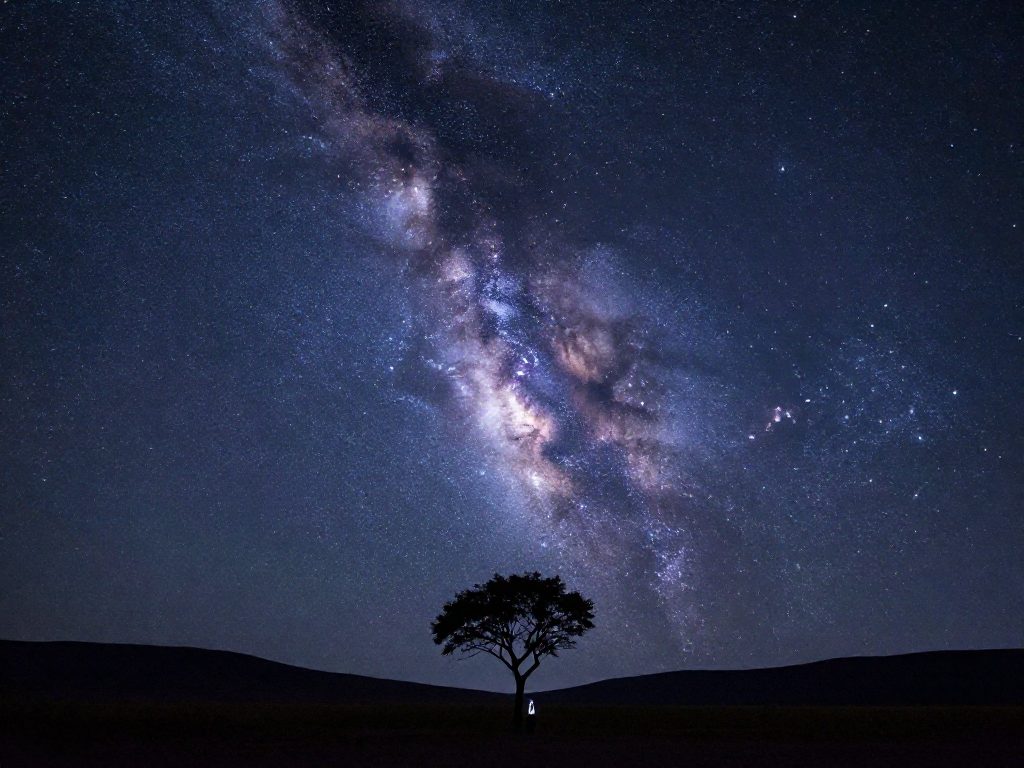
3. Frame an interesting foreground. A lone sky can feel empty. Place a tree, a rooftop, or the horizon along the bottom of your shot. This gives a sense of scale and makes the photo feel like a place, not just a screen of dots.
4. Trigger hands-free. Pressing the screen jiggles the phone. Use the built-in timer (2–3 seconds) or a Bluetooth remote, then stay still while it captures.
5. Review and reshoot. Too dark? Raise ISO or exposure. Too bright or grainy? Lower them. Adjust one setting at a time and try again.
Quick takeaway: Steady the phone, use Night/Pro mode, focus to infinity, trigger with a timer, then tweak and reshoot. That loop is all it takes to capture your first star photo.
Easy Targets for Beginners
The fastest way to fall in love with night-sky photography is to start with subjects that almost guarantee a win. Here are five beginner-friendly targets, roughly from easiest to most ambitious.
-
The Moon. Your easiest target by far. Because it's so bright, use a short exposure (the camera "blinks" quickly so the image doesn't wash out) and a low ISO (low light sensitivity, which keeps the photo clean and grain-free). Zoom in a little or crop afterward to reveal craters.
-
Bright planets. Venus and Jupiter shine as steady, brilliant points of light, brighter than any star. You won't capture their detail with a phone, but they make stunning accents next to the Moon or on the horizon at dusk.
-
Star fields and constellations. Point at a recognizable pattern like Orion and let the camera gather light for a few seconds. Suddenly stars appear that your eyes can barely see.
-
The Milky Way. This one needs a truly dark sky, far from city glow, and the right season (spring through fall for the bright core in the Northern Hemisphere, per NASA).
-
Star trails. Using a dedicated star-trail app, you can record the stars' slow arcs across the sky as Earth turns.
Quick takeaway: Start with the Moon, then work your way up.
Quick Editing to Make Your Photos Pop
Here's a secret most beginners miss: the photo straight off your phone is just the starting point. A few minutes of editing can turn a flat, hazy shot into something that actually captures the wonder you felt looking up. Best of all, you can do it for free with apps like Snapseed or Lightroom Mobile.
You don't need to be an expert. Just play with these sliders:
- Contrast and brightness. Raise the contrast (the difference between light and dark) and gently lower the overall brightness. This deepens the sky from a washed-out gray to a rich, inky black—so the stars stand out like sparks against velvet.
- Clarity or texture. A small boost here sharpens fine details and helps faint stars pop into view.
- Noise reduction. Night photos often look grainy, like TV static. The noise-reduction slider smooths that away. Then nudge the white balance (the color "temperature") until the scene looks natural, not too blue or orange.
One rule: don't overdo it. If the stars look fake or the colors feel cartoonish, dial it back. The goal is to reveal what was really there.
Quick takeaway: A few gentle slider tweaks in a free app can transform an ordinary phone photo into a striking one—just keep it looking real.
Common Mistakes to Avoid
Even great phones can produce disappointing shots when a few simple things go wrong. Here are the usual culprits and quick fixes:
- Flash on or autofocus hunting. Your flash lights up nothing in space—turn it off. In the dark, autofocus often "hunts" (slides back and forth searching for something to lock onto). Switch to manual focus and set it to infinity, the setting for far-away objects.
- Holding the phone by hand. Even tiny hand shakes blur a long exposure (a photo where the camera collects light for several seconds). Use a small tripod, or prop the phone on a wall or rock.
- Shooting from a bright spot. Streetlights and city glow ("light pollution") wash out faint stars. Get away from lights and let your eyes adjust for 15–20 minutes.
- Exposures too long. Earth's rotation turns stars into streaks ("star trails") if your shot runs too long. For crisp points, keep exposures under about 15–20 seconds.
- ISO too high. ISO controls light sensitivity; pushing it too far adds grainy speckles called "noise." Raise it gradually instead of maxing it out.
FAQ
What phone is best for night sky photography?
The best phone is usually the one you already own. Recent flagship models from Apple (iPhone 12 and later), Google (Pixel 6 and later), and Samsung (Galaxy S21 and later) have a built-in "Night mode" that gathers light over several seconds, which makes a huge difference for star photos. What matters most isn't the brand but three things: a dedicated night or long-exposure mode, manual or "Pro" controls so you can adjust settings yourself, and the ability to save photos in RAW format (an uncompressed file that keeps more detail for editing later). If you're shopping, look for those features rather than chasing the newest release.
Do I need a tripod to photograph the stars with my phone?
Yes, in almost every case. Night photos require your phone's camera to stay open for several seconds to soak up faint starlight, like leaving a bucket out longer to catch more rain. Even the tiniest hand movement during that time turns pinpoint stars into blurry streaks. A small, inexpensive phone tripod solves this completely. If you don't have one yet, prop your phone against a wall, a rock, or a backpack so it stays perfectly still, and use the timer or a voice command to take the shot so you don't shake it by tapping the screen.
Why do my night photos look grainy or blurry?
These are two separate problems with simple fixes. Grain (those speckly dots) appears when the phone boosts its light sensitivity, called ISO, too high to brighten a dark scene. Lowering the ISO and letting the camera stay open a bit longer instead usually produces a cleaner image. Blur, on the other hand, comes from movement, either the phone wobbling or you tapping the screen. Steady the phone on a tripod or solid surface and trigger the photo with a timer. One more cause of soft, hazy shots is the lens itself, so give it a quick wipe before you start.
Can I photograph the Milky Way with an iPhone or Android phone?
Yes, and the results can be genuinely stunning. The Milky Way is the hazy band of our own galaxy, made of billions of stars too distant to see individually. Modern phones with Night mode can capture it, but only under the right conditions: a truly dark location far from city lights, a clear and moonless night, and the phone held perfectly still on a tripod for a multi-second exposure. Set your camera to its longest night-mode exposure, point toward the darkest part of the sky, and be patient. You won't match a professional telescope photo, but seeing the Milky Way emerge on your screen is a real thrill.
What app should I use for phone astrophotography?
You actually need two kinds of apps. First, a camera app with manual control so you can set a long exposure: many phones offer this in their built-in "Pro" or "Night" mode, and free or low-cost apps add it if yours doesn't. Second, a stargazing app that uses your phone's location and compass to label what's overhead, helping you find planets, constellations, and the Milky Way before you shoot. Popular, well-regarded options include Stellarium and SkySafari for identifying objects. Start with your phone's native night mode, since it's free and surprisingly capable, and add other apps only once you want more control.
What's the best time and place to take night sky photos?
The best place is somewhere dark, away from streetlights and city glow, which wash out faint stars the way a bright room hides a candle. Even driving 30 minutes outside town makes a dramatic difference; dark-sky parks are ideal. For timing, aim for a clear, cloudless night during the new moon, when the Moon's light isn't competing with the stars. Let your eyes adjust for about 20 minutes after arriving, and check a weather and Moon-phase forecast beforehand. As a quick takeaway: dark location, clear sky, no Moon, steady phone, and a little patience will give you the best shot.
See also
- How to find the Milky Way in the night sky
- Best meteor showers to watch this year
- How to read a light pollution map
- Beginner's guide to stargazing without a telescope
- How to identify planets with the naked eye
Related articles
What Causes the Northern Lights, and Can Beginners See Them?
Curious about the Northern Lights? Learn what causes auroras in plain language, where and when to see them, and realistic tips for total beginners.
Jun 29, 2026 · 8 min read
A Beginner's Sky-Watching Calendar: Events Worth Looking Up For
A simple year-round sky-watching calendar for beginners. Discover meteor showers, eclipses, and planet sightings worth looking up for—no telescope needed.
Jun 29, 2026 · 5 min read
Best Times and Places to See the Milky Way With Your Own Eyes
Learn the best times, seasons, and dark-sky spots to see the Milky Way with your own eyes—no telescope or jargon required.
Jun 29, 2026 · 10 min read